These are the instructions for the "Merry Christmas" card topper I demo'd in our first meeting.
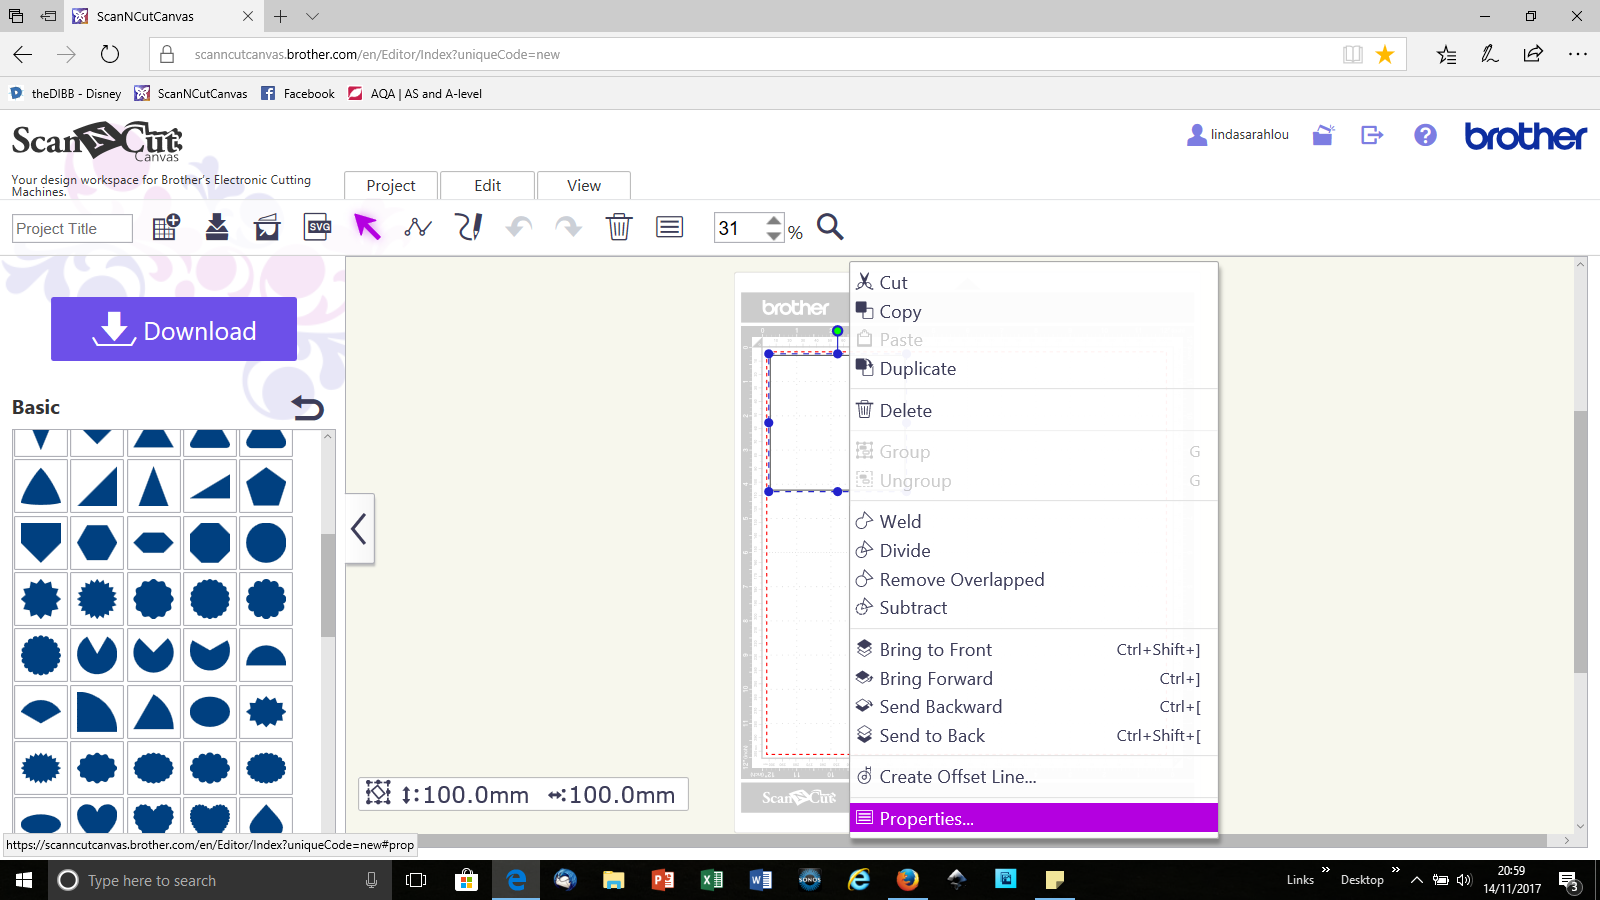
1. On a new project page select the first square from Basic Shapes. With the object selected - right click the mouse over the shape and select properties.
2. Change the fill shape to a colour (this does not have any effect on the end cutting result - just helps us to see the layers as we build the design :) )
3. I have selected a red for the square
4. Back to the basic shapes on the left - move down the shapes and select the cirle. I have then moved the circle elsewhere on the page so it is not on top of the square.
5. With the circle still selected - right click on circle and select properties and change the colour of this shape to something different than the square.
6. When the circle is moved back over the square it should appear like this. The circle is on top of the square.
Note. If the circle appears "behind" the square like this ...
... with the circle selected click Edit, then Bring to Front
7. Resize the square and circle to the size required to fit your card size. For this demo I have assumed a 6"square card base and just resized the square.
7. Position circle on top of square then select both objects together
8. Select Edit and Align to Centre horizontally ...
... then Edit and Align to Centre vertically.
9. With both shapes still selected Edit and Subtract ...
... this will leave you with one shape a square with a hole!
10. On the left panel select the back arrow to return to the Pattern menu, then select Logo.
11. Move down til you find the "Merry Christmas" and click to add to workspace
12. Resize (if necessary) and position the logo across the centre of the "hole"
13. Edit, Create Offset Line (to create a border around the words)
14. In this instance and I have reduced the spacing to 3mm, make sure outward is selected
15. Words with border ...
... for ease of design I have moved both word elements away from the Square
16. Now move the "border" back the the hole and position where you want it. Note - it needs to overlap to enable us to "attach" it to the square.
17. With the Square and the word background selected, Edit, Weld
18. This make one object the square (with hole) and word border all in one - Our Frame. Notice the the red fill colour has disappeared. If yours doesn't dont worry it still makes no difference to the final cut.
19. To cut this out the Frame and Words should be cut from contrasting coloured cardstock.
Other borders and backgrounds could be cut to compliment the design.
Apologies I have not actually cut and assembled the card but this screen shot gives an idea of a white 6x6 inch card with the Frame we have created cut in green, the words in gold/yellow, and another square (slightly larger than our frame) cut to go behind the "hole" and also create a border around it.
Understanding layers of objects is critical when designing in
Canvas - I can only really suggest practice, putting objects on the
page and seeing what the options do.
Hopefully this makes sense - let me know if anything is confusing and I will try to rework, or reword where necessary.
Thanks for looking.